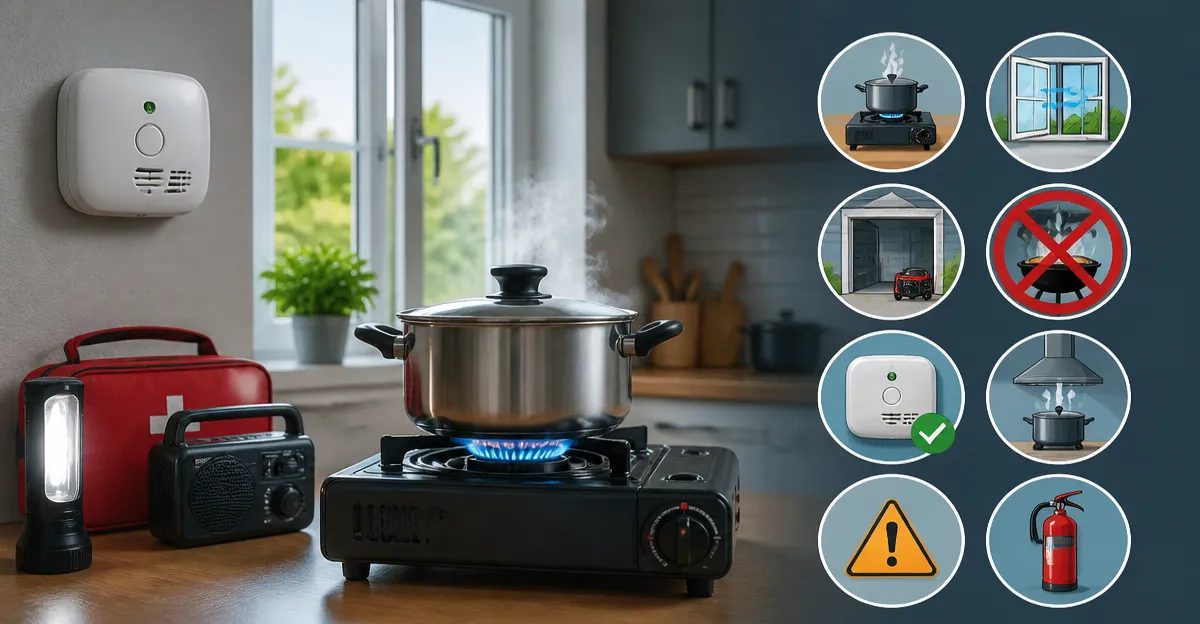
How to Prevent Carbon Monoxide Poisoning When Cooking Indoors During an Emergency: 8 Essential Safety Steps
Introduction
During an emergency, many households rely on indoor cooking appliances that produce heat and, in some cases, carbon monoxide (CO). Carbon monoxide is a colorless, odorless gas that can cause severe health effects or death when inhaled in sufficient quantities. This guide will teach readers eight essential safety steps to prevent CO poisoning while cooking indoors, explain why each step matters, and recommend reliable detection tools from Kidde. By following these procedures, one can protect family members, pets, and property even when power is unavailable.
The information presented is practical, actionable, and grounded in industry‑standard safety principles. Readers will learn how to assess risk, create ventilation, monitor CO levels, and maintain equipment. The guide also includes expert tips, troubleshooting advice, and a curated list of recommended products that have proven performance, high customer ratings, and competitive pricing.
What You’ll Need
- Battery‑powered carbon monoxide detector(s) – see product recommendations below.
- Plug‑in carbon monoxide detector with battery backup – optional for continuous monitoring.
- Fire extinguisher rated for kitchen fires (Class K).
- Window or door opening tools (e.g., a screwdriver for vent covers).
- Basic kitchen safety equipment (oven mitts, timers, etc.).
Step 1: Assess the Emergency Situation
Before beginning any cooking activity, determine the nature of the emergency. If the power grid is down, confirm that backup generators are operating outside the home and are properly ventilated. Indoor generators or charcoal grills used without adequate airflow can produce lethal CO concentrations within minutes. Understanding the source of power helps you decide which ventilation measures are required.
During this assessment, verify that all family members are aware of the emergency plan and know where the CO detectors are located. Clear communication reduces panic and ensures that everyone can respond quickly if an alarm sounds.
Step 2: Establish Adequate Ventilation
Proper ventilation is the most effective method for diluting carbon monoxide produced by cooking appliances. Open windows, exterior doors, and any available vents to create a cross‑draft that moves fresh air through the kitchen. If the building has a mechanical ventilation system, set it to “exhaust” mode to pull indoor air outward.
When using a portable generator indoors, never operate it in an enclosed space. Position the generator at least 20 feet from any opening and direct the exhaust away from the house. Even a small opening can prevent dangerous gas buildup.
Step 3: Install and Activate a Battery‑Powered CO Detector
Even with ventilation, CO can accumulate in hidden pockets, especially in rooms without windows. A battery‑powered detector provides continuous monitoring independent of household electricity. The Kidde Portable AA CO Alarm (3rd Ed) is a compact, wall‑mountable unit that runs on two AA batteries, emits an 85 dB alarm, and displays green and red LEDs for power status and hazard detection. It costs $23.97, holds a 4.8‑star rating from 1,678 reviews, and includes a test‑reset button for quick verification.
Place one detector on each level of the home, particularly near the kitchen and sleeping areas. The device’s event memory records the last detection, allowing you to review recent exposure after the emergency has passed.
Step 4: Add a Plug‑In Detector with Battery Backup for Continuous Coverage
While battery‑only detectors are essential during power outages, a plug‑in detector offers the advantage of continuous power when electricity is restored. The Kidde Plug‑In CO Alarm with AA Backup (3rd Ed) connects to a standard 120 V outlet and includes a two‑AA‑battery backup for outages. It features an 85 dB alarm, digital display of CO levels, and a smart‑hush button that silences false alarms for approximately eight minutes.
Install this unit in the kitchen area where it can draw power from the outlet and still operate during an outage. The dual power source ensures that you never lose detection capability, even if the battery is depleted or the outlet fails.
Step 5: Use Multiple Detectors for Comprehensive Coverage
Large homes or multi‑unit dwellings benefit from multiple detectors to eliminate blind spots. The Kidde AA CO Alarm 6‑Pack (3rd Ed) provides six battery‑powered units for $199.99, each with the same electrochemical sensor technology, LED status indicators, and test‑reset button. The pack’s 4.7‑star rating from 193 reviews demonstrates consistent performance across multiple installations.
Deploy the detectors in each bedroom, the hallway outside the kitchen, and any basement or garage where fuel‑burning appliances may operate. This strategy creates overlapping zones of protection, ensuring that a single faulty unit does not leave an area unmonitored.
Step 6: Monitor Cooking Appliances and Avoid Hazardous Practices
Never use outdoor grills, charcoal briquettes, or camp stoves inside a home, even if a window is open. These devices produce high concentrations of CO that can overwhelm ventilation. Instead, rely on electric or induction cooktops that do not emit CO. If a gas stove is the only option, keep the flame low, use exhaust fans, and never leave the appliance unattended.
Regularly inspect burners, pilot lights, and vent hoods for blockages or corrosion. A clogged vent can cause exhaust gases to recirculate into the kitchen, dramatically increasing CO risk. Clean filters according to the manufacturer’s instructions and replace them when they appear dirty.
Step 7: Develop an Emergency Response Plan
All household members should know the signs of CO poisoning: headache, dizziness, nausea, and confusion. If the detector sounds, evacuate the premises immediately, move to fresh air, and call emergency services. Do not re‑enter the home until a qualified professional has verified that CO levels are safe.
Practice the evacuation route weekly, and keep a list of emergency contacts near the kitchen. Having a plan reduces response time and minimizes exposure during a real incident.
Step 8: Perform Regular Maintenance and Testing
Battery‑powered detectors require periodic battery replacement, typically every year or when the low‑battery indicator flashes red. The Kidde Portable AA CO Alarm (5th Ed) includes a test/hush button and a clear LED that changes color to indicate battery health. Priced at $24.97 with a 4.7‑star rating from 131 reviews, it offers a travel‑ready design that can be moved between locations.
Test each detector monthly by pressing the test button. Replace any unit that fails to sound or display correctly. Keep a log of test dates and battery changes to ensure compliance with safety standards.
Tips & Pro Tips
- Place detectors at least five feet above the floor, as CO mixes evenly with air but sensors are calibrated for typical breathing height.
- Do not install detectors directly above or beside fuel‑burning appliances; a small distance prevents false alarms caused by brief exhaust spikes.
- Consider using a carbon monoxide detector with digital readout, such as the plug‑in model, to gauge the exact ppm level during a low‑level exposure.
- When using a generator, position it on a concrete pad to prevent moisture damage and to keep exhaust away from windows.
- Keep a fire extinguisher rated for kitchen fires (Class K) within arm’s reach; a CO incident can quickly become a fire emergency.
Troubleshooting
| Problem | Possible Cause | Solution |
|---|---|---|
| Alarm chirps intermittently | Low battery | Replace the AA batteries with fresh ones; reset the detector using the test‑reset button. |
| No sound during test | Faulty sensor or dead battery | Replace the unit; sensors have a limited lifespan of 5‑7 years. |
| Frequent false alarms | Improper placement near exhaust vents | Relocate the detector at least three feet away from stove hoods or dryer vents. |
Conclusion
Preventing carbon monoxide poisoning while cooking indoors during an emergency requires a combination of ventilation, monitoring, equipment maintenance, and clear emergency procedures. By following the eight steps outlined above, one can significantly reduce the risk of exposure, protect vulnerable family members, and maintain peace of mind during stressful situations. Remember that detection devices are the final safeguard; they provide early warning that can save lives when all other precautions are in place.
Implement the recommended practices today, test your detectors regularly, and ensure that every household member knows how to respond. Safety is a continuous process, and diligent preparation is the most reliable defense against invisible hazards such as carbon monoxide.
Products Mentioned in This Guide
Frequently Asked Questions
What are the eight essential steps to prevent carbon monoxide poisoning while cooking indoors during an emergency?
Follow proper ventilation, use battery‑powered CO detectors, keep appliances maintained, never use outdoor grills indoors, monitor CO levels, keep windows/doors open when safe, avoid blocked exhausts, and have an evacuation plan.
How does proper ventilation reduce the risk of carbon monoxide buildup?
Ventilation dilutes CO by allowing fresh air to replace contaminated indoor air, preventing dangerous concentrations from accumulating.
Why is a battery‑powered carbon monoxide detector essential during power outages?
It operates independently of the grid, providing continuous CO monitoring when electricity‑dependent alarms cannot function.
Is it safe to use a gas stove or charcoal grill indoors during an emergency?
Only a properly vented gas stove may be used briefly; charcoal grills and unvented burners should never be used indoors because they release high levels of CO.
What are the early symptoms of carbon monoxide poisoning and what should I do if I notice them?
Symptoms include headache, dizziness, nausea, and confusion; immediately move to fresh air, turn off the source, and seek medical attention.